In this blog, we will learn how to integrate PhonePe Payment Gateway in Laravel step-by-step using APIs.
- PhonePe Payment Flow
- Laravel API Integration
- Create Payment Request
- Redirect Users to PhonePe
- Verify Payment Status
- Handle Callback & Response
Why Use PhonePe in Laravel?
PhonePe is widely used across India and supports multiple payment methods. It is known for fast UPI transactions and a smooth checkout experience.
Main Benefits:
- Fast UPI payments
- Trusted Indian payment platform
- Supports mobile and web payments
- Secure transaction processing
- Easy API integration
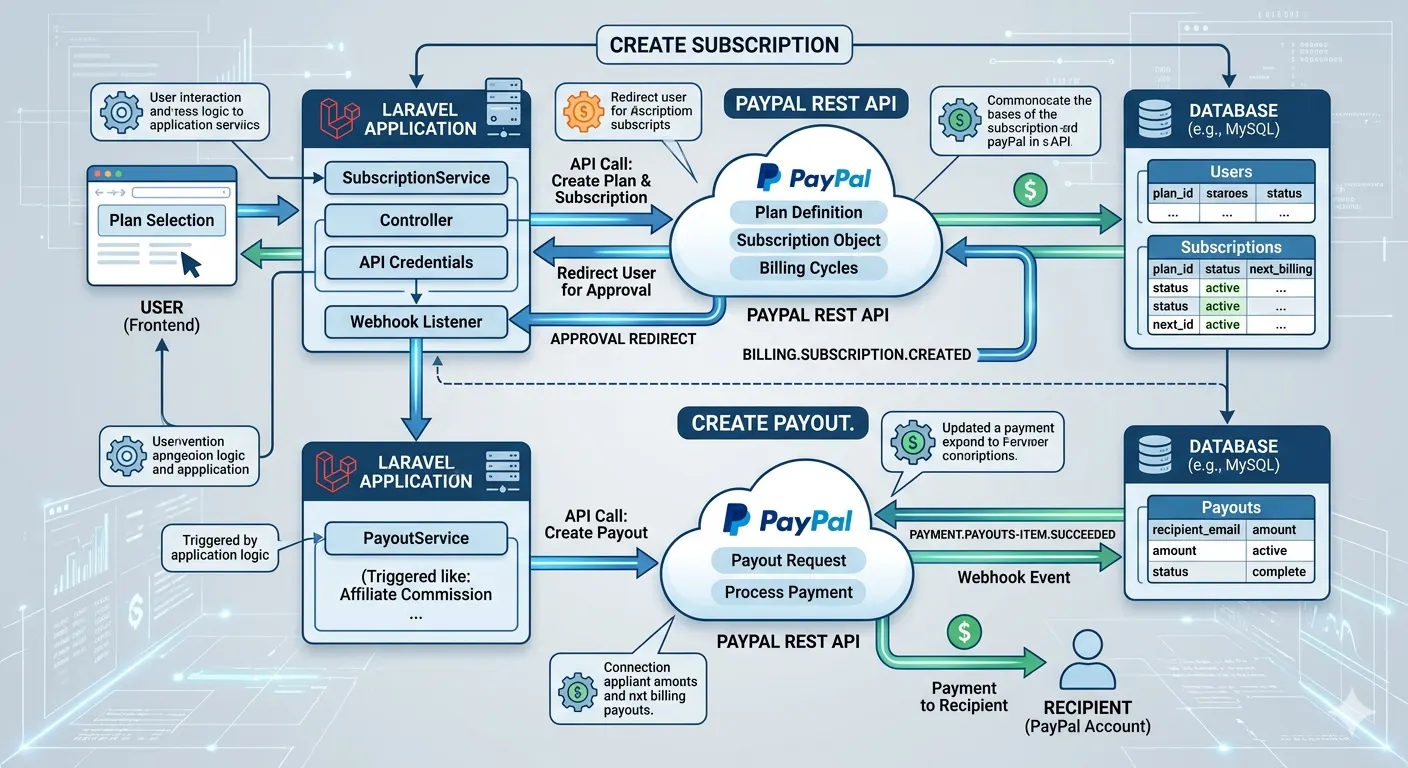
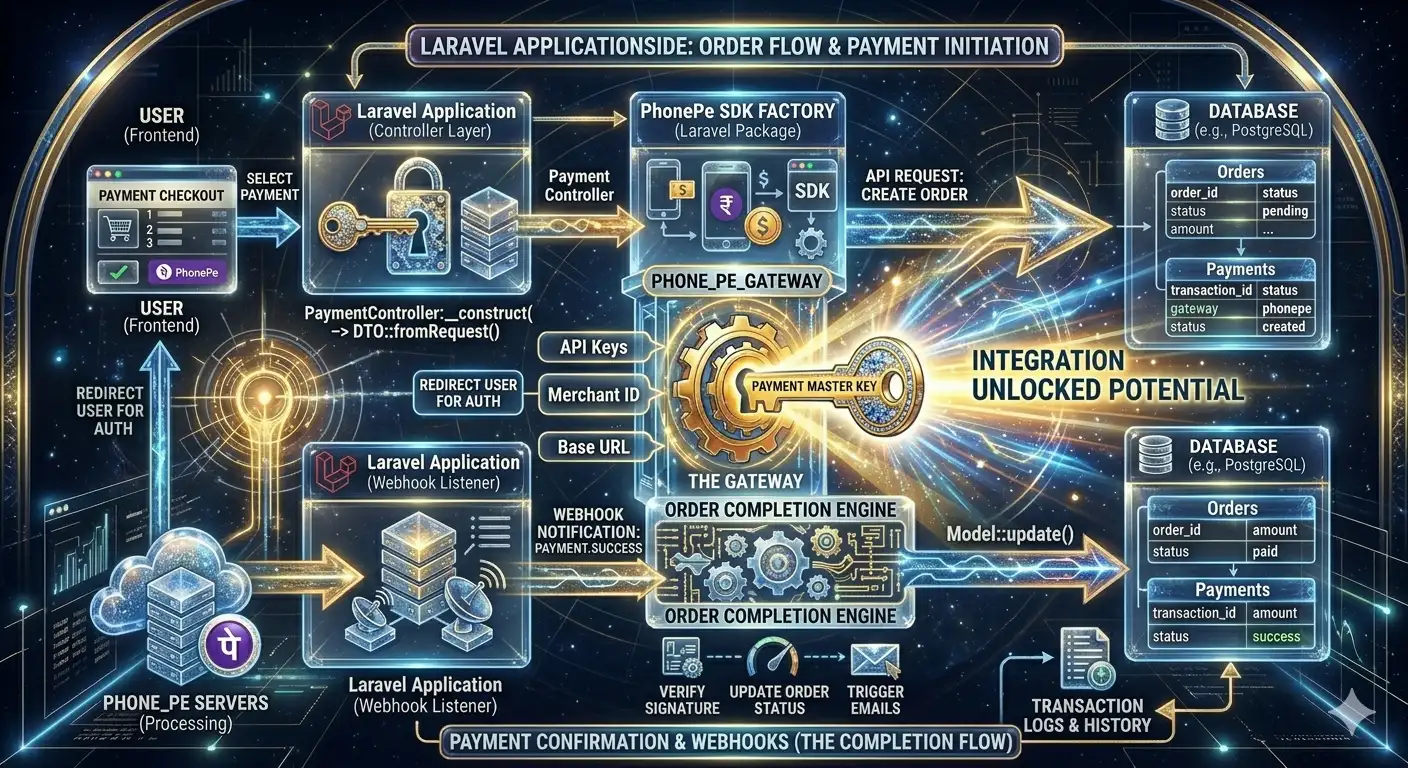
PhonePe Payment Flow
| Step | Description |
|---|---|
| 1 | User clicks Pay Now |
| 2 | Laravel creates payment request |
| 3 | User redirects to PhonePe payment page |
| 4 | User completes payment |
| 5 | PhonePe redirects back to callback URL |
| 6 | Laravel verifies transaction status |
Step 1: Create PhonePe Merchant Account
Before integration, you need PhonePe merchant credentials.
- Create a merchant account
- Get Merchant ID
- Get Salt Key
- Get Salt Index
- Enable Sandbox Access
These credentials are required for API authentication.
Step 2: Configure Laravel Environment
Add PhonePe credentials inside your .env file.
PHONEPE_MERCHANT_ID=YOUR_MERCHANT_ID
PHONEPE_SALT_KEY=YOUR_SALT_KEY
PHONEPE_SALT_INDEX=1
PHONEPE_ENV=UAT
Step 3: Create Payment Route
Route::post('/phonepe/pay', [PhonePeController::class, 'pay']);
Route::get('/phonepe/callback', [PhonePeController::class, 'callback']);
Step 4: Create Payment Request
In this step, Laravel sends payment details to PhonePe API.
public function pay(Request $request)
{
    $merchantId = env('PHONEPE_MERCHANT_ID');

    $data = [
        "merchantId" => $merchantId,
        "merchantTransactionId" => uniqid(),
        "merchantUserId" => "USER123",
        "amount" => 10000,
        "redirectUrl" => url('/phonepe/callback'),
        "redirectMode" => "POST",
        "callbackUrl" => url('/phonepe/callback'),
        "mobileNumber" => "9999999999",

        "paymentInstrument" => [
            "type" => "PAY_PAGE"
        ]
    ];

    $encode = base64_encode(json_encode($data));

    $saltKey = env('PHONEPE_SALT_KEY');
    $saltIndex = env('PHONEPE_SALT_INDEX');

    $string = $encode . "/pg/v1/pay" . $saltKey;

    $sha256 = hash('sha256', $string);

    $finalXHeader = $sha256 . '###' . $saltIndex;

    $response = Http::withHeaders([
        'Content-Type' => 'application/json',
        'X-VERIFY' => $finalXHeader
    ])->post('https://api-preprod.phonepe.com/apis/pg-sandbox/pg/v1/pay', [

        'request' => $encode

    ]);

    $responseData = $response->json();

    return redirect(
        $responseData['data']['instrumentResponse']['redirectInfo']['url']
    );
}
Understanding Amount Format
PhonePe accepts amounts in paise.
- ₹1 = 100
- ₹100 = 10000
So if you want to charge ₹500, you must send 50000.
Step 5: Verify Payment Status
After payment completion, always verify the transaction using PhonePe status API. Never trust frontend success response directly.
public function callback(Request $request)
{
    $merchantId = env('PHONEPE_MERCHANT_ID');

    $transactionId = $request->transactionId;

    $saltKey = env('PHONEPE_SALT_KEY');

    $saltIndex = env('PHONEPE_SALT_INDEX');

    $string = "/pg/v1/status/" . $merchantId . "/" . $transactionId . $saltKey;

    $sha256 = hash('sha256', $string);

    $xVerify = $sha256 . '###' . $saltIndex;

    $response = Http::withHeaders([
        'Content-Type' => 'application/json',
        'X-VERIFY' => $xVerify,
        'X-MERCHANT-ID' => $merchantId
    ])->get(
        "https://api-preprod.phonepe.com/apis/pg-sandbox/pg/v1/status/$merchantId/$transactionId"
    );

    $result = $response->json();

    if($result['success'] == true)
    {
        // Payment Success
    }
    else
    {
        // Payment Failed
    }
}
Important Security Tips
- Always verify payment status from backend
- Store transaction IDs in database
- Never trust callback response directly
- Use HTTPS in production
- Log failed API responses
Database Fields You Should Store
| Field | Description |
|---|---|
| transaction_id | Unique PhonePe transaction ID |
| amount | Payment amount |
| status | Success or failed |
| payment_method | UPI/Card/Wallet |
| response_data | Complete API response JSON |
Sandbox vs Production Environment
| Sandbox | Production |
|---|---|
| Testing Environment | Live Payments |
| Dummy Transactions | Real Money Transactions |
| Safe for Development | Used by Real Customers |
Common Use Cases
- eCommerce websites
- Recharge applications
- Food delivery platforms
- Subscription platforms
- Booking applications
- Marketplace systems
Final Thoughts
PhonePe integration in Laravel is quite simple once you understand the payment flow properly. The most important thing is handling security correctly and verifying every transaction from the backend.
If your application targets Indian users, PhonePe can significantly improve payment success rates because of its strong UPI ecosystem and trusted brand value.
Whether you are building a small startup or a large-scale platform, integrating PhonePe with Laravel can provide a fast, secure, and smooth payment experience for your users.